In today’s fast-paced digital landscape, advertisers are constantly searching for ways to capture the attention of their target audience while ensuring they do not disrupt the online experience. This is where native advertising comes into play — a solution specifically designed to blend seamlessly with content and, as a result, provide a non-intrusive way to engage users. Unlike traditional advertising types, native ads mimic the format and function of the content surrounding them.

Consequently, they create a more natural and relevant user experience.
If you’re looking to create a native campaign that not only attracts attention but also delivers results, Adsaro offers an intuitive platform designed to help advertisers like you build and optimize these campaigns with ease. Whether you’re aiming to promote a product, service, or content, Adsaro’s tools enable you to craft personalized, high-performing native ads that resonate with your target audience.
In this guide, we are creating a campaign for www.softsaro.com, a company specializing in IT solutions, social media marketing, and SEO services.
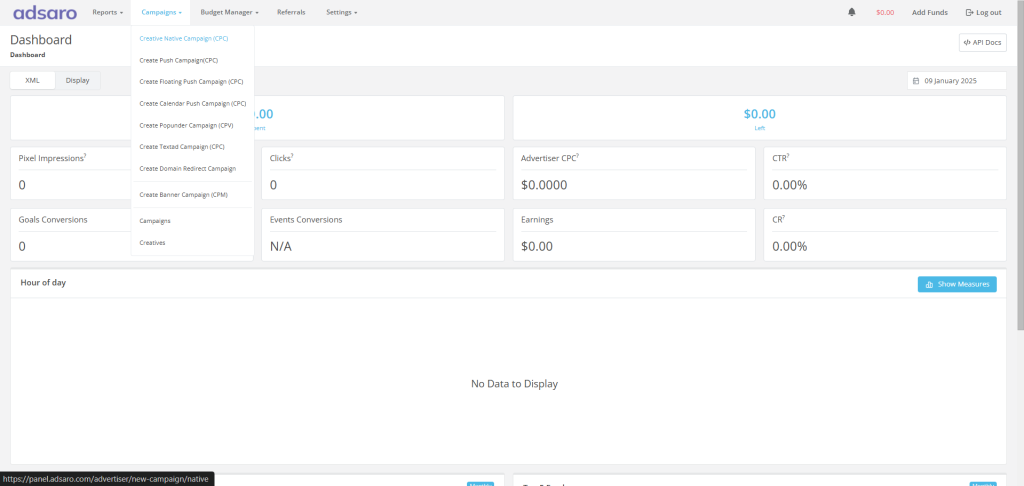
STEP 1: On your dashboard, Under the Campaigns section, click on create native campaigns.
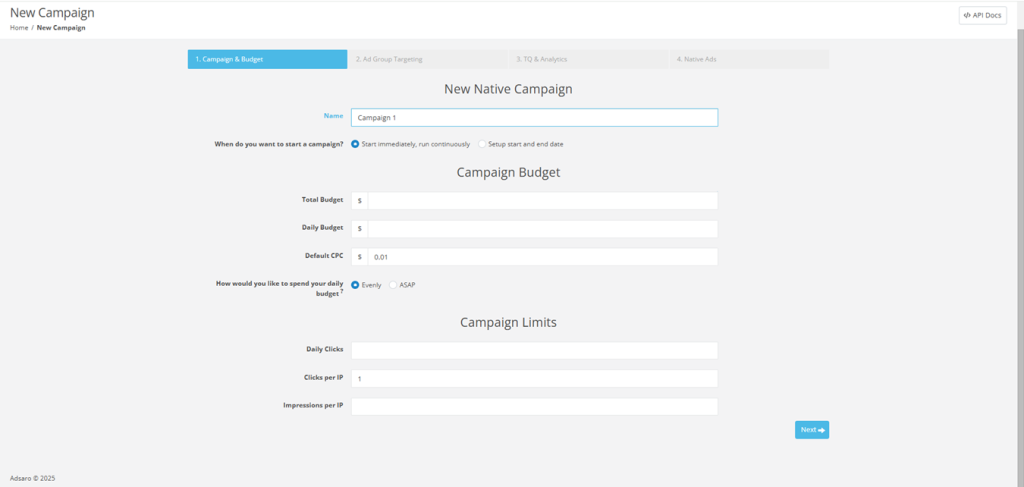
STEP 2:First, set the name of your campaign. For Instance, in this native campaign setup, we have named it Campaign 1. After that, decide whether you want to run the campaign immediately after verification or set a specific start and end date.
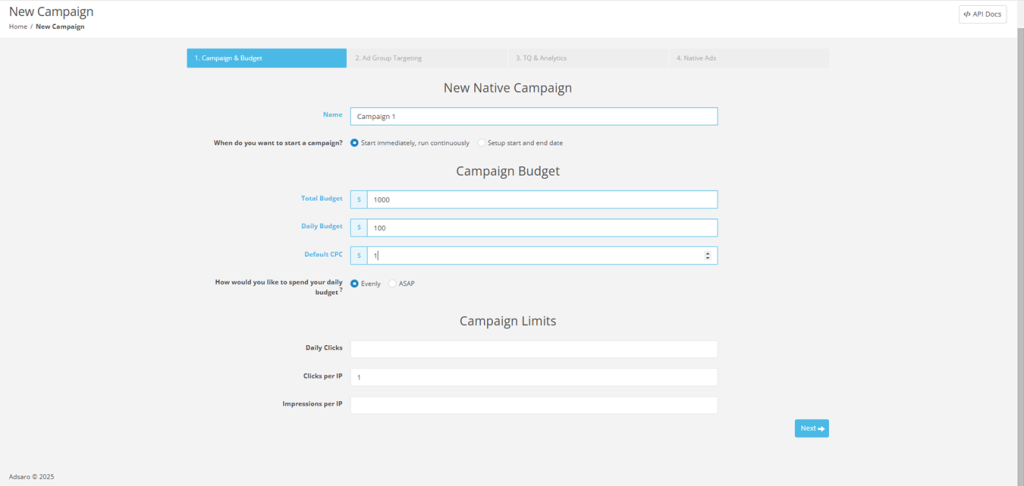
STEP 3: Next, set the budget for your campaign. To clarify, the total budget refers to the maximum amount of money allocated to run the campaign over its entire duration, whereas the daily budget is the amount spent in a single day. In addition, the default CPC represents the bid amount for the campaign. For example, in this native campaign guide, we have set the total budget to $1000, the daily budget to $100, and the CPC to $1.
If you select evenly, the budget will be distributed proportionally during the day. In case of ASAP, budget limit will be fulfilled as soon as possible. Set it according to your campaign requirements.
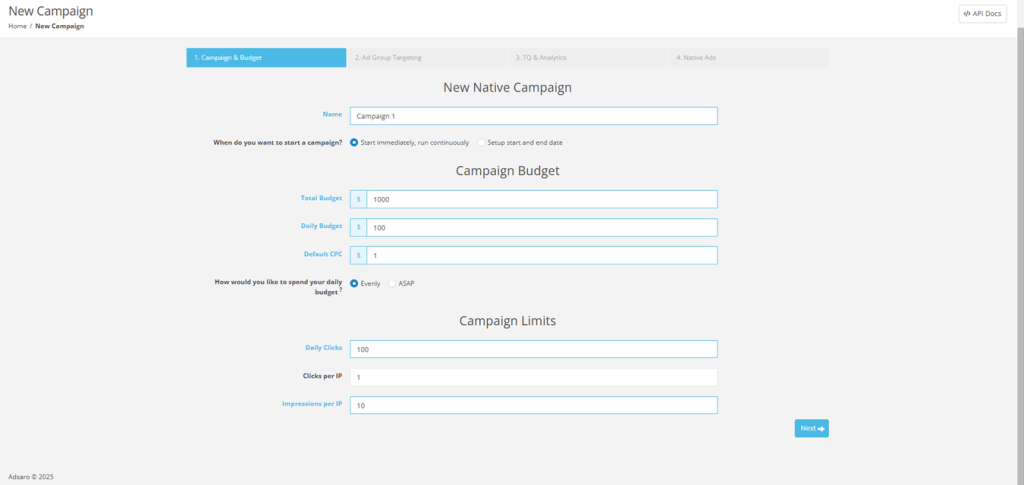
STEP 4: Now, set the clicks and impression limits for your campaign. To begin with, daily clicks refer to the total number of times users click on an ad within a single day. Meanwhile, clicks per IP measure how many times users from a single IP address can click on an ad. Similarly, impressions per IP track how often an ad is displayed to users coming from a single IP address.
For example, in this native campaign setup, we have set daily clicks to 100, 1 click per IP, and 10 impressions per IP. However, you should adjust these settings based on your specific campaign goals.
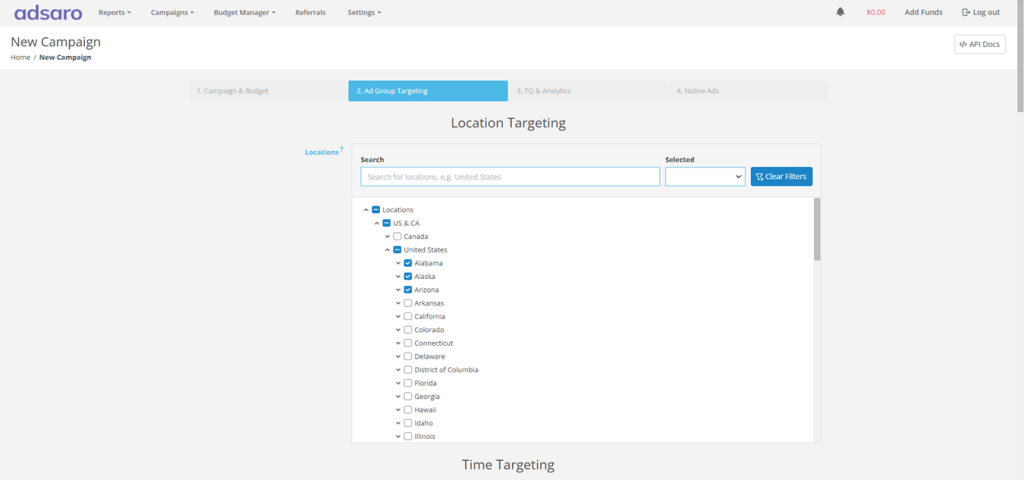
STEP 5: Next, target the geographical locations where you want your ads to be displayed. In Adsaro, we offer highly specific targeting options so that your ads are shown only to the audience you want to reach. For instance, you can target all GEOs, specific continents, countries, or even cities.
In this native campaign setup, we have targeted Alabama, Alaska, and Arizona, which are states in the United States. As a result, the ad will only be shown to audiences in these three states. Make sure to choose locations that align with your campaign goals.
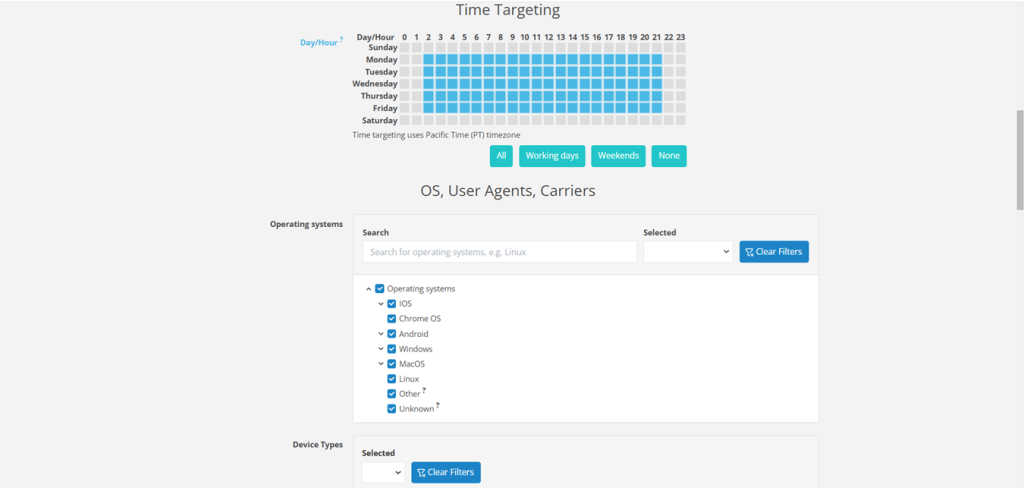
STEP 6: Under Time targeting, schedule the ads to run during specific times of the day or on particular days of the week. For this native campaign setup, we have set the ads to run on working days between 02:00 to 21:00.
[Please note that Adsaro Uses Pacific Time (PT) time zone. So, ensure you converted the time to your desired time zone.]
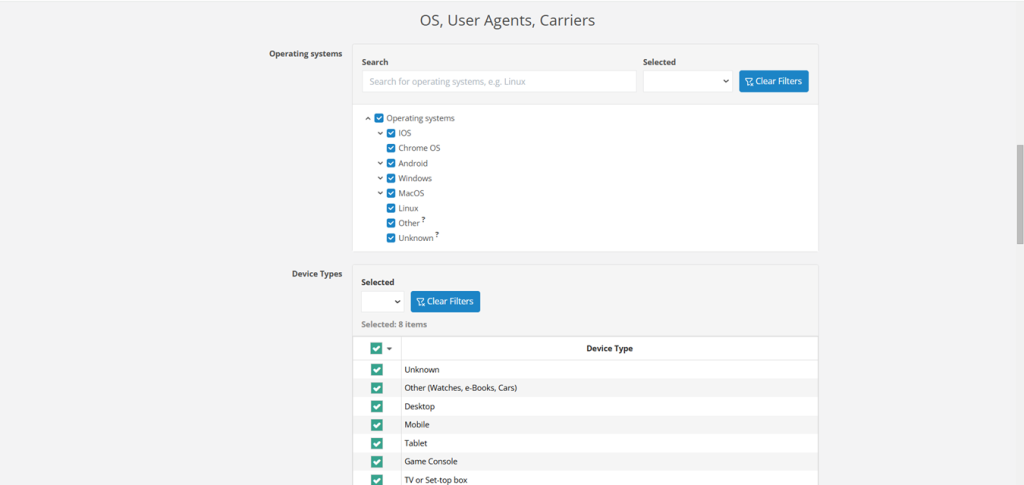
STEP 7: Set the Operating systems you want to show your ads. OS Targeting shows your ads to the users browsing on Selected OS. For this native campaign setup, we are targeting every OS.
STEP 8: Target the device types such as desktop, TV, VR, etc. which best suites your adformat. For this native campaign setup, we are targeting our ads to show only in mobile and desktop. Set them according to your campaign strategy.
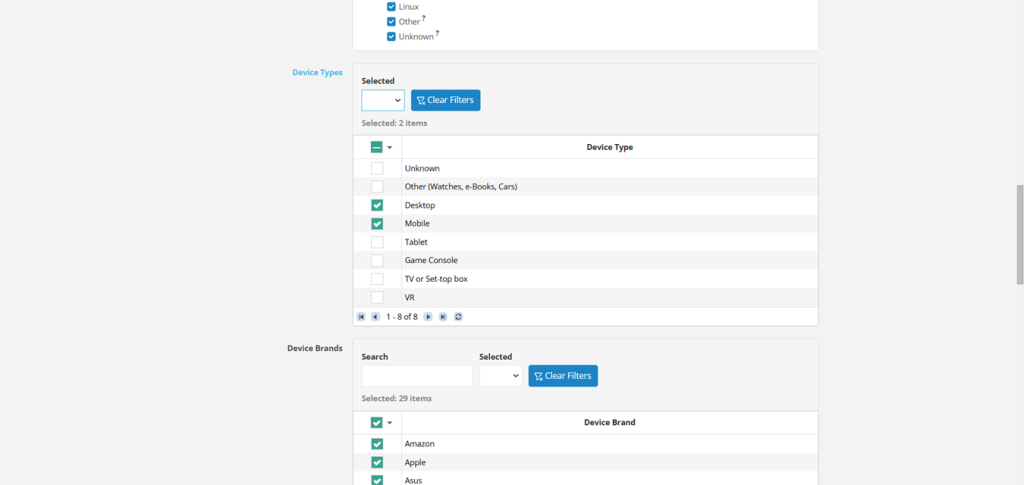
STEP 9: In Adsaro, you can target your ads to run on specific device brands according to your needs. For example, in this native campaign setup, we have selected all brands. Choose and set the brands according to your strategy.
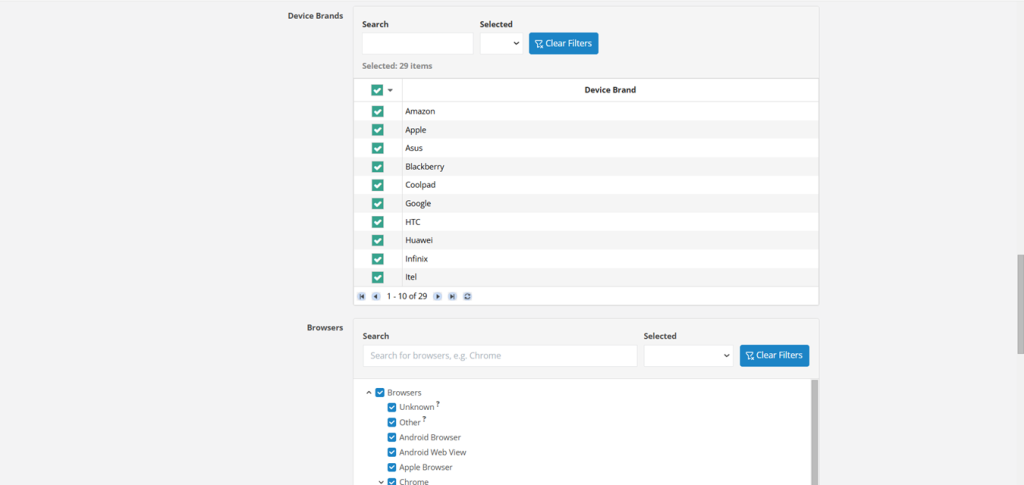
STEP 10: Browser targeting enables your ads to run only on selected browsers. If selected, our system automatically includes new browser versions not listed here. For this native campaign setup, we have selected all browsers and enabled auto include new browser versions.
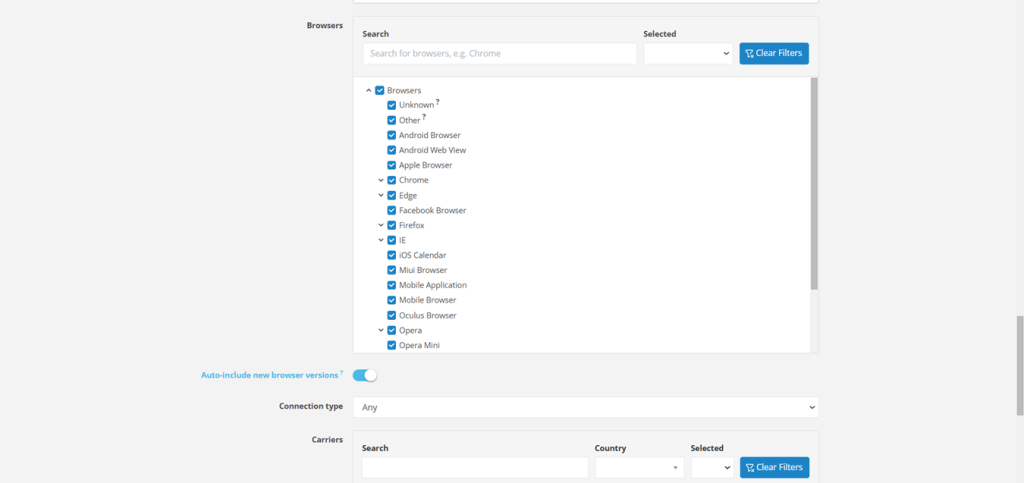
STEP 11: Select the connection type specifically WIFI or cellular or both. It targets and shows your ads to users browsing from Wi-Fi or cellular or both. Select the network carriers according to countries. For this native campaign setup, we have set it to all.
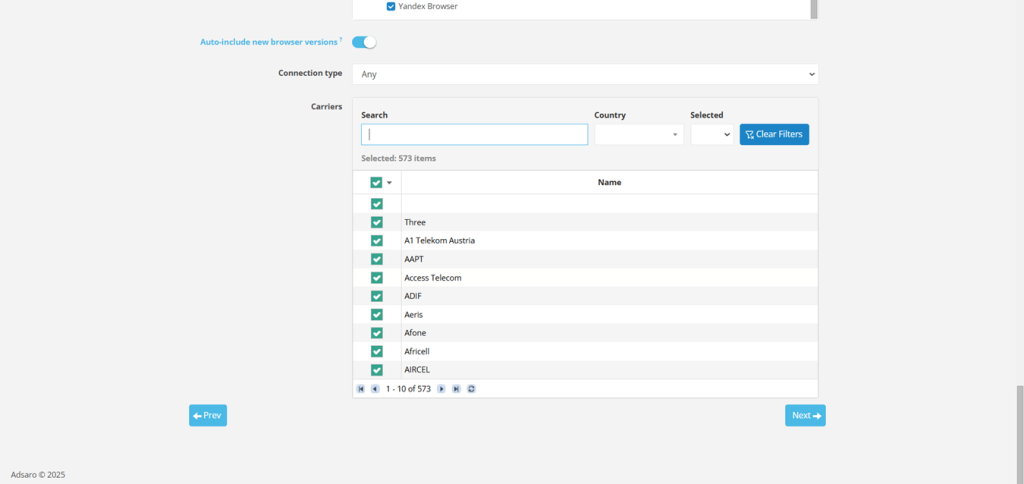
CLICK NEXT
STEP 12: You can Whitelist your Zones, Publishers, Websites, etc. from here if you have any preferences or you can skip this part.
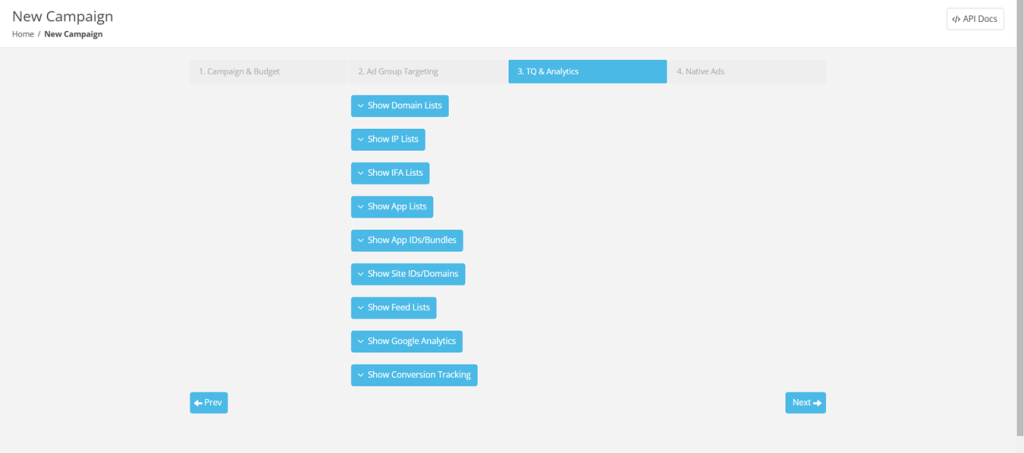
CLICK NEXT
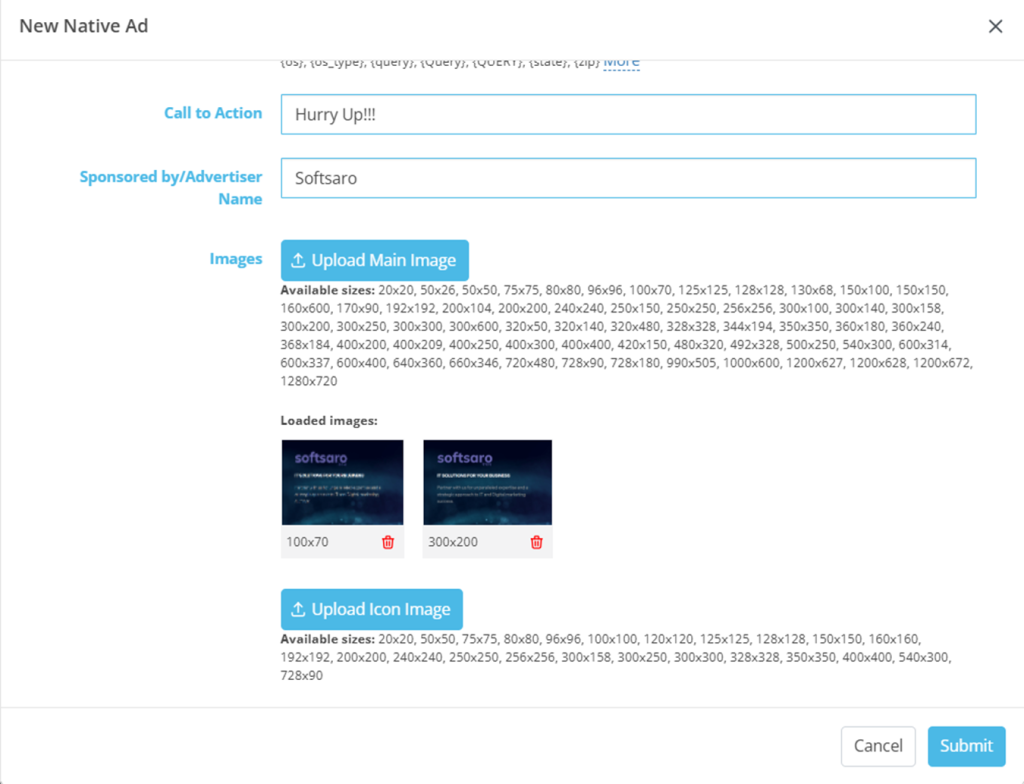
STEP 13: Add Your creative, destination URL, call to action and your description in this section.
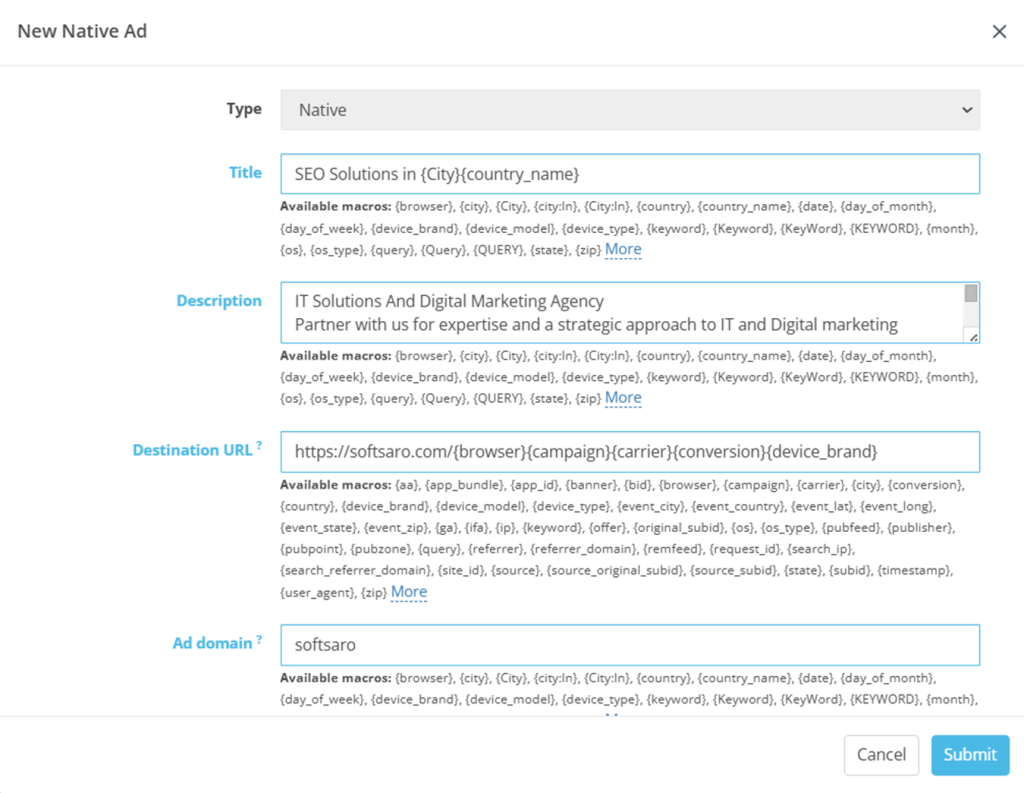
Title: The title of your native ad.
Destination URL: The landing page of the advertisement.
Description: Describe about what you are offering.
Ad Domain: The URL that will appear in your ad.
Call To Action: a prompt that encourages the audience to take your desired action.
Images: Upload your creative. Set the required size.
STEP 13: Click Submit.
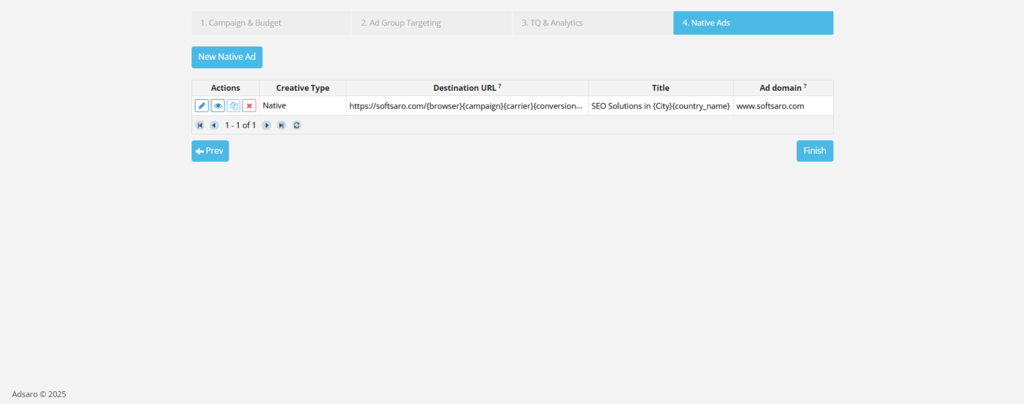
CLICK FINISH



Leave a Reply